
One of the issues with rooting your device is the inability to update your phone via OTA. Any security patches or software updates pushed out by the OEM are lost because your bootloader is unlocked. However, you still can update your device, it just a take a bit more effort.
Because OTA updates are designed for stock firmware, any modifications can cause issues with the installation of the software updates. While you can easily ignore this, OTAs are important.
OTAs are more than just security patches and software updates. Many OEMs will package new features and bug fixes that improve the experience. This is why you don’t want to ignore OTA. Although it takes some effort, updating your rooted device is worth it.
Step 1: Flash the Factory Images
To properly install the update, your phone needs to be returned to its original firmware (the way it was before you made any changes). If you used a systemless root method and did not make any permanent changes to files in the system partition on your phone, you’ll only need to reinstall the stock boot image. Otherwise, you’ll need to reinstall the entire firmware before accepting the update.
If you’re unsure about whether or not you rooted with a systemless root method or if you don’t know what you modified using root access, we recommend flashing the entire stock firmware package for your phone.
For those new to the process, we have a guide that breaks down all the steps. We even included some of the links for the factory images of some popular smartphones commonly used by the rooting community. Start from Step 6, as you don’t need to re-unlock your bootloader, and make sure you download the factory image for the firmware version you are currently on.
Step 2: Flash TWRP
Once you flash your device to the factory image, you will lose all your modifications: custom ROMs, root, and more importantly, TWRP. You’ll need to bring back TWRP so you can flash the OTA update and re-root. Since you were previously rooted, this process should be familiar already, but check out the link below for a refresher on installing TWRP.
Step 3: Flash the OTA File Using ADB Sideload
Now, you need the OTA file from the OEM. This is a ZIP file for firmware version for the OTA update. Typically, you find this on the manufacturer’s official website (we link some below).
If you can’t find the OTA file on the OEM’s website, you have two more options. First, you can Touchez the OTA update notification on your phone, let the OTA download, but don’t install it yet. Instead, look for the downloaded OTA file with a root file explorer. Most phones will store this file in /cache from the root partition, while others will store it in /data/data or on your internal storage partition in a folder named .ota.
If you can’t find the OTA file on your phone after downloading it, try searching through the threads in XDA. XDA has a forum for pretty much every Android phone, and there is a good chance someone posted the file. And if you can’t find one, you can always request one to see if anyone was able to get it.
Either way, you’ll need to move the file onto your computer. Once you’ve done that, boot back into TWRP. You can use a button combination (usually power and volume down when your phone is shut down), but this varies between devices. So for the most surefire way, you’ll need to use ADB.
On your computer, install ADB and Fastboot, then open a command prompt or Terminal window and redirect to the ADB and Fastboot directory. If you are unsure how to do this, use the link below for a complete tutorial.
Now, connect your device to your computer using a USB cable (preferably the OEM cable). Open Settings, select Developer Options, and enable USB Debugging. Select “OK” on the “Allow USB debugging” popup.
On your computer, input the following command,
adb devices
You should a series of number and letters and the word “device.” If you don’t see this or if the command prompt or terminal display s”unauthorized,” unplug and replug your USB cable and make sure to select “OK” on the popup.
If everything looks correct, input the following command:
adb reboot recovery
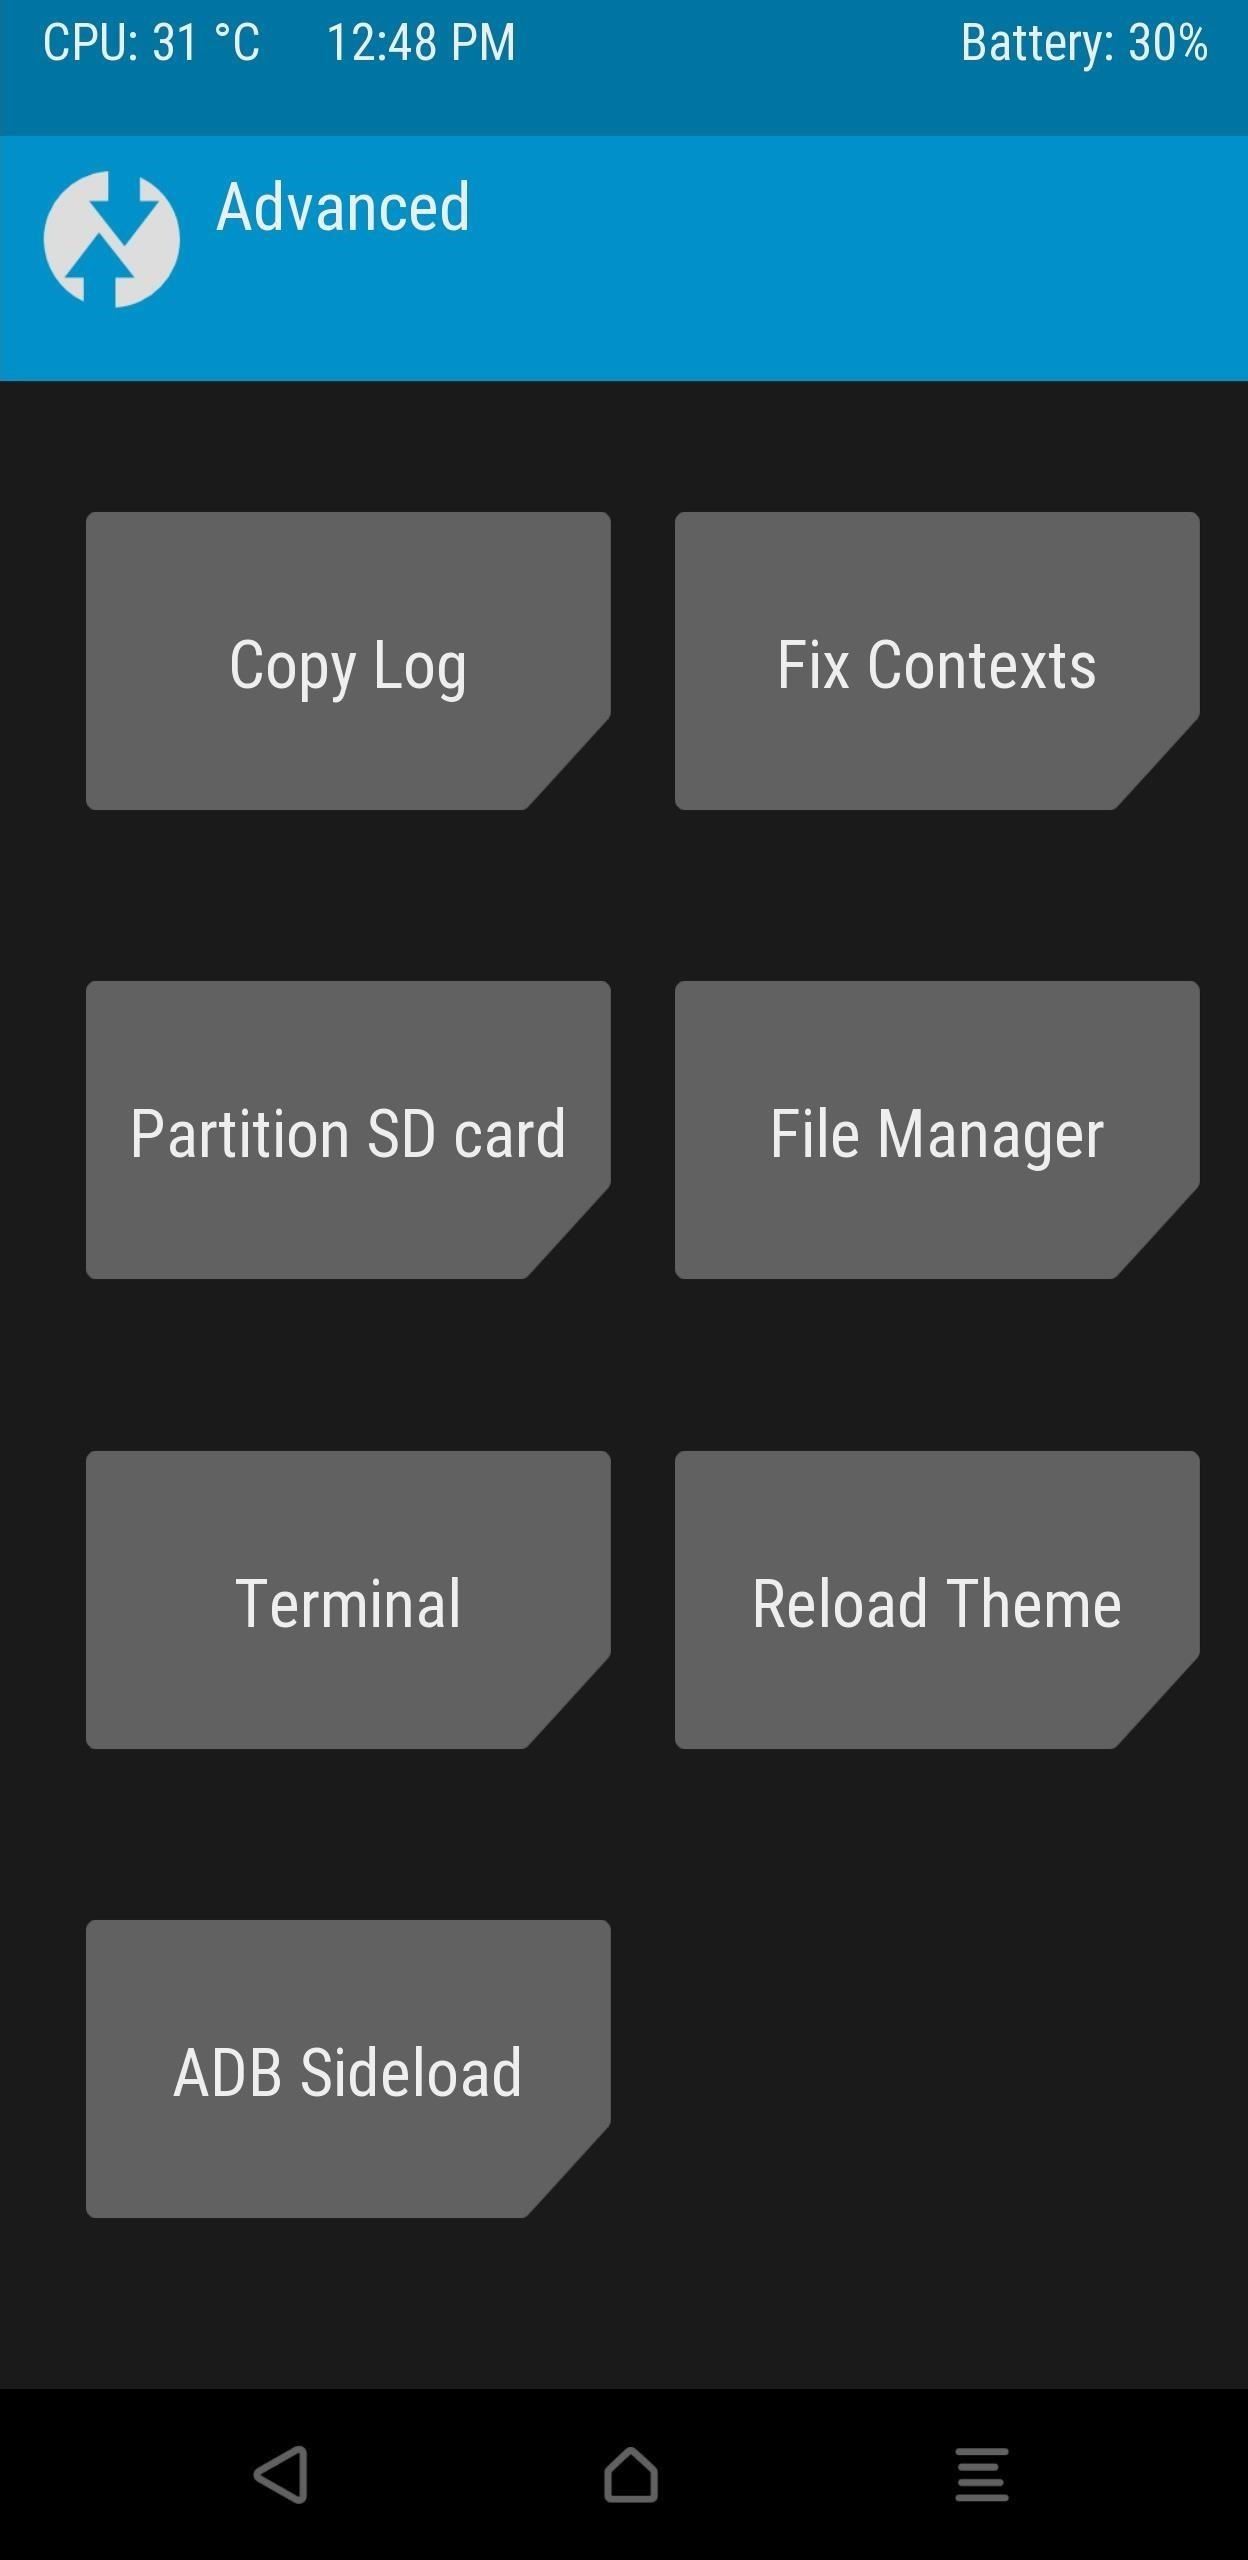
Your device will restart and open up TWRP. When you reach the main menu, select “Advanced” and “ADB Sideload.”
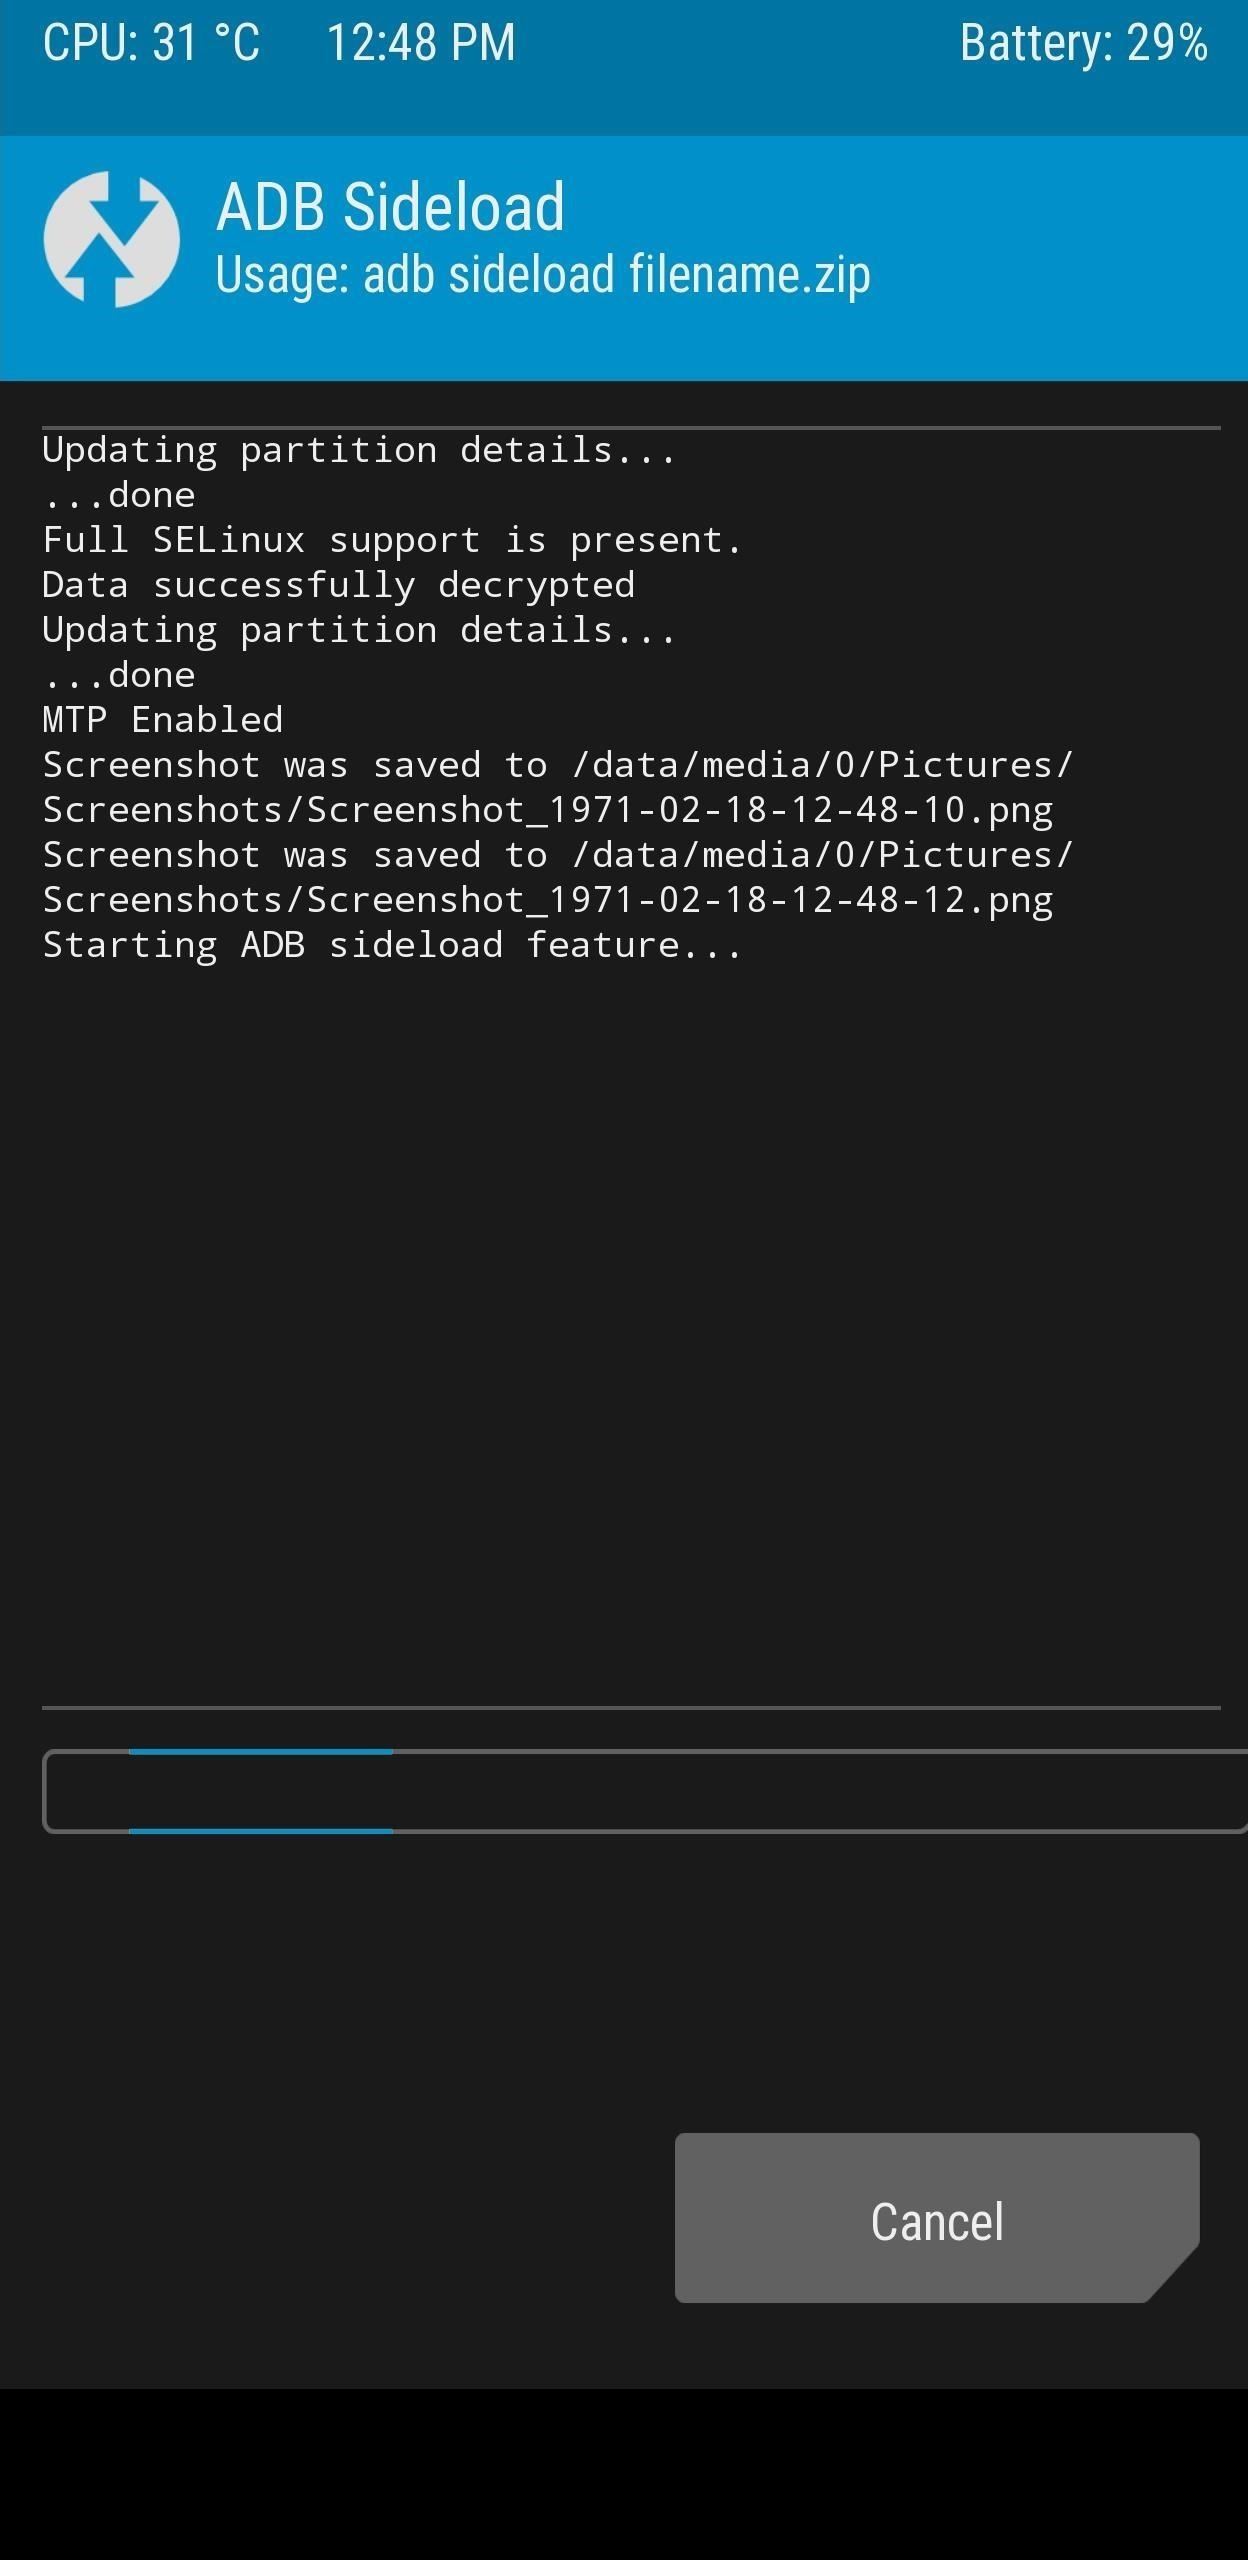
On your computer, input the following:
adb sideload <ota.zip>
Replace <ota.zip> with the OTA file. You must include the full name and location of the file. The easiest way to accomplish this is to type the first part of the command (adb sideload), add a space, then drag and drop the OTA file into the terminal or command prompt. Press enter, and after the OTA finishes installation, select “Reboot” on your phone.
Step 4: Flash the Magisk ZIP
After you restart the system, double check that the update was installed correctly. Open Settings and choose “System.” Select “About phone” and find the build number. The build number should be the same number as the update version, indicating you are running the OTA.
Now it’s time to re-root. Make sure Magisk ZIP file is still on your phone’s SD card or internal storage. If not, open your Magisk Manager app and select “Install,” then Touchez “Install” again on the prompt, and finally, choose “Download ZIP only.”
Repeat the instructions in Step 3 to reboot back into the recovery. When you reach TWRP’s main menu, select “Install” and choose the Magisk ZIP. Swipe right on the slider to install Magisk. Reboot your phone using the button below, and you’ll have root once again.
Cover image and screenshots by Jon Knight/
